
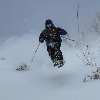
Damn those graphics are sweet.
Results 1,151 to 1,175 of 7388
-
12-06-2016, 10:42 PM #1151
 Registered User
- Join Date
- Nov 2006
- Location
- idaho panhandle!
- Posts
- 10,502
-
12-06-2016, 11:11 PM #1152
 registered peruser
- Join Date
- May 2009
- Location
- inpdx
- Posts
- 21,213
looks like a successful mount to me -- did you get the forward pressure nailed? Originally Posted by klauss

if you're in pdx, we could chat/drink over them if you want some help next time
i'm no shop tech but i've mounted them
-
12-07-2016, 10:29 AM #1153

 "touring guy"
- Join Date
- Jan 2009
- Location
- SLC burbs
- Posts
- 4,429
Mounted those for the lady friend yesterday, now she's gonna kick my ass at skiing too...
Note: small screw = best centerpunch used to date.
-
12-07-2016, 11:14 AM #1154
Registered User
- Join Date
- Nov 2006
- Location
- idaho panhandle!
- Posts
- 10,502
Noice!
-
12-07-2016, 11:26 AM #1155
 Registered User
- Join Date
- Mar 2009
- Location
- OR
- Posts
- 1,948
thanks. Yeah, they are on there solid and correct. It just didn't seem like the heels should go on in the method I chose. I am used to having the brakes off on sallys, other bindings when mounting. I kept the brakes on the heels when I mounted these pivots... Originally Posted by acinpdx
-
12-07-2016, 06:07 PM #1156
 Registered User
- Join Date
- Feb 2008
- Location
- here and there
- Posts
- 18,790
Killin sum time today, old set of K2 piste stinks and G3 cable binders now mated.
watch out for snakes
-
12-07-2016, 07:13 PM #1157
 Me encanta el país alto
- Join Date
- Dec 2005
- Location
- 山
- Posts
- 16,763
It's 1998 all over again! Originally Posted by scottyb

-
12-07-2016, 07:26 PM #1158
 Registered User
- Join Date
- Jan 2008
- Location
- BC to CO
- Posts
- 5,119
It helps if the skis are in a vise, or on blocks. If you try to mount FKS heels with the skis flat on the bench you're gonna struggle and ovalize the holes in the skis. This is the number one reason for FKS tear outs. Originally Posted by klauss
-
12-07-2016, 10:06 PM #1159
Registered User
- Join Date
- Mar 2009
- Location
- OR
- Posts
- 1,948
I had the skis on blocks, but I had to manually press the brake pedal to access rear screws while trying to get the mount started. It was awkward. I could see someone potentially "ovalize the holes" trying to mount on flat surface. I was surprised how tight the heel hole pattern is on these. Originally Posted by Dee Hubbs
-
12-08-2016, 08:19 AM #1160
 Registered User
- Join Date
- Aug 2016
- Location
- No longer Alexandria, VA
- Posts
- 2,681
Just drilled the first hole on my first mounting attempt. Alignment of the paper template is dialed in, but the bit drifted slightly (~.5mm) and the hand drill went in at a slight angle.
Amateur hour. I don't think my center punch was deep/wide enough. I used an 8d finishing nail.
Assuming all the other holes are drilled on point, I think I can recover from this no problem (just tighten this screw last?).
Few questions:
1) Any tips on recovering from a slightly off center hole in the toe piece?
2) This mount is Plum Guides. Going to ski them for a few days, then I want to install inserts and also mount a pair of STH. Should I glue in the Guides for the first mount or wait to glue until I install inserts?
3) Any tips to recover from an off-center/crooked hole when installing inserts?
-
12-08-2016, 08:30 AM #1161
 Registered User
- Join Date
- Dec 2012
- Posts
- 17,751
So these are inserts?
Inserts don't tolerate much off-centeredness. But one way to correct this is to tap the hole at a bit of an angle and install the insert at a bit of an angle. The other is to use a slow setting epoxy and try to get the screw/insert to align with a bit of force.
You don't want to force the machine screw into an off center insert--you will just strip the threads on the screw and eventually the insert.
Some ski top sheets are slippery and to prevent the bit wandering on the next set of holes:
1. Use a binding specific bit and a real punch, not a nail or,
2. Drill a pilot hole with a 1/16" bit--if that wanders you can correct it.
Good luck."timberridge is terminally vapid" -- a fortune cookie in Yueyang
-
12-08-2016, 09:12 AM #1162
 Registered User
- Join Date
- Sep 2009
- Location
- PNW -> MSO
- Posts
- 8,278
Next time... try tightening the front two screws of the heel to just snug before starting the rear ones. When you lift the brakes to access the rear screws, the heel assembly will stay flat on the ski. Originally Posted by klauss
Also, a slight countersink on the fresh holes helps to guide screws into place.
-
12-08-2016, 09:26 AM #1163
 Registered User
- Join Date
- Mar 2011
- Location
- Tahoe
- Posts
- 1,175
Tech bindings especially plums with a metal base won't tolerate much misalignment. The heel pins need to line up perfectly. Inserts have pretty much zero tolerance (less so than regular screws) so you need to get it right. Originally Posted by thefortrees
If you're going to inserts anyways 100% I'd just fill that 1 hole now with machinable epoxy and re drill correctly. Use the small starting bit on this hole when re drilling to get it right. Then drill the other holes. Do a test mount with regular screws. If that's good then you can enlarge the holes for inserts.
If you're not using inserts then you might get away with correcting that error while tightening the bindings down (do it slowly with the boot as a guide for pin alignment) but no guarantee. If you do this with inserts however you run the risk of the insert going in crooked and that error will be compounded with inserts. Then you'd be SOL.
-
12-08-2016, 09:48 AM #1164
Registered User
- Join Date
- Sep 2009
- Location
- PNW -> MSO
- Posts
- 8,278
Edit... ^ this guy beat me to it.
1. Get the heels in place, then start all the toe screws but don't torque em. Click a boot into the pincers and make sure the heel pins line up with the boot heel slots, shifting the toe piece as needed, then torque the front screws with the boot still clicked in. You'll set the correct alignment even with one wonky screw. Originally Posted by thefortrees
2. Glue is mostly to keep water out of the core... and it won't hinder the second drilling for inserts. A vote for gluing the Plums even for only a couple days.
3. Do you have access to a drill press? If you can clamp the ski flat to the table, the press should make a straight hole with the larger diameter, stiffer tap drill bit for the inserts. If you don't have access to a drill press, you could make a drill guide out of a piece of metal or wood to clamp to the ski.
When installing the inserts, use a long set epoxy and mount the bindings in em quick to help pull the inserts straight and true to the binding holes. The thread class allows a tiny amount of wiggle, and this has helped me get clean running screws from imperfect templates/drilling in the past.
Good luck.Last edited by Norseman; 12-08-2016 at 10:00 AM.
-
12-08-2016, 10:19 AM #1165
Registered User
- Join Date
- Sep 2010
- Location
- SW CO
- Posts
- 5,630
Agree with the blonde viking. I've fixed many a messed up hand mount with that technique.
One additional tip: sometimes one boot will align better based on slight deviations in the boot's tech inserts. So sometimes a R and L ski makes sense if you've botched the mount. YMMV."Alpine rock and steep, deep powder are what I seek, and I will always find solace there." - Bean Bowers
photos
-
12-08-2016, 11:09 AM #1166
Registered User
- Join Date
- Dec 2012
- Posts
- 17,751
I'm amazed at how many here need a drill press or guide block to drill a straight 9mm hole. Originally Posted by Norseman
 Practice on a piece of wood until you figure out how to hold a drill?
It is important that you tap vertically with inserts though"timberridge is terminally vapid" -- a fortune cookie in Yueyang
-
12-08-2016, 11:13 AM #1167
 Registered User
- Join Date
- Oct 2008
- Location
- Golden, CO
- Posts
- 2,900
My drill has a level on it. I've had good results on 4-5 pairs of skis so far. Doing my first inserts soon.
-
12-08-2016, 11:19 AM #1168
Registered User
- Join Date
- Sep 2009
- Location
- PNW -> MSO
- Posts
- 8,278
"Need" is subjective of course... Originally Posted by Timberridge
If you happen to have one in the shop, they make for easy ass ski drillin. I like having a redundant depth stop, too.
-
12-08-2016, 11:20 AM #1169
Registered User
- Join Date
- Dec 2012
- Posts
- 17,751
Yes, or buy one of those Dewalts with a bubble level ^^^
You could drill the most perfectly vertical hole with a press, then if you 1) go screw the insert in w/o tapping or 2) don't take you time and tap slowly and carefully...
 "timberridge is terminally vapid" -- a fortune cookie in Yueyang
-
12-08-2016, 12:25 PM #1170
Me encanta el país alto
- Join Date
- Dec 2005
- Location
- 山
- Posts
- 16,763
Bubble level drill - $65 Originally Posted by Timberridge
Garage sale drill press - $40
Amount of time saved w/drill press (and not practicing) - $∞
Which is to say, I <3 my {cheap from a garage sale) drill press for mounting tech bindings.
-
12-08-2016, 12:36 PM #1171
Registered User
- Join Date
- Dec 2012
- Posts
- 17,751
Amount of grief saved by wife not asking "where the hell do you intend to put that thing?" - $∞

Plus the ability to drill a straight hole also comes in handy for holes that are horizontal. I've never tried to drill a horizontal hole (i.e., for a lock set) w/ a press but it looks difficult."timberridge is terminally vapid" -- a fortune cookie in Yueyang
-
12-08-2016, 01:15 PM #1172
Registered User
- Join Date
- Mar 2008
- Location
- northern BC
- Posts
- 34,003
just gona go ahead and point out if you use my wine cork ghetto depth gauge it lets you 2 hand the drill and hold it right at the end of the bit for more stability
I m not into the insert thing my reasoning being why use a product that would take away the reasons to buy more skis but I would assume you really need to drill that hole perpendicular ?Lee Lau - xxx-er is the laziest Asian canuck I know
-
12-08-2016, 08:52 PM #1173
Registered User
- Join Date
- Feb 2010
- Posts
- 802
I think you have this wrong. Inserts are actually an excuse to buy new skis: "Well, these are on sale, and I won't even need new bindings..." Originally Posted by XXX-er
-
12-09-2016, 07:47 AM #1174
Registered User
- Join Date
- Aug 2016
- Location
- No longer Alexandria, VA
- Posts
- 2,681
Just finished mounting a ski for the first time. One plank left to go... Turned out perfect from what I can tell, and wanted to share some tips I picked up along the way. It really is a straight forward process like all the mags say. Just takes patience and measuring, re-measuring, and re-measuring.
- For first attempts, definitely do dry runs on 2x4s until you're comfortable. Took me 4 practice mounts to work out issues.
- Use Jondrum's paper templates. Take more time than you expect to align them - measure using several different methods. These forums, Binding Freedom's Youtube tutorials, WildSnow.com, and other random blogs are very helpful for this.
- The paper templates aren't guaranteed to line up down to the mm, so don't blindly start drilling. Use them as a starting point and fine tune with the actual bindings.
- If you don't have a drill press, buy one of these: https://www.amazon.com/Gator-Tools-S.../dp/B0061FY004
- Punch holes well so the drill bit doesn't drift. I had one drift about .5mm on the toe but I was able to recover because the other holes were spot on.
- Drill first with a small starter bit, lay binding on top to verify center, then drill with the larger bit.
- For tech bindings, drill one hole on the toe piece. Screw it in a few turns to hold the toe, then start mounting the heel piece. Click in the boot and use this position as the final template for the remaining holes in the heel and toe. This is where I noticed the paper template was off a bit. Glad a mag suggested this approach.
-
12-11-2016, 08:18 PM #1175
 Registered User
- Join Date
- Jan 2004
- Location
- Boulder
- Posts
- 1,397
PSA: Mount your own fucking skis.
Mounted my own f'ing (rock) skis and it took way longer than it should have. Hardest part was figuring out mount point.
First day on them today and no rip-outs. Phew.

Last edited by ski-wpk; 12-11-2016 at 09:04 PM.

 Reply With Quote
Bookmarks