
Aw damn. A nickel is worth five cents. So I typed five, but I actually measured three nickels. Just fifteen cents. So I did it right. Right?
Results 876 to 900 of 7388
-
12-26-2015, 12:59 PM #876
 Huck Test Monkey
- Join Date
- Mar 2007
- Posts
- 1,158
-
12-26-2015, 04:09 PM #877
Registered User
- Join Date
- Mar 2012
- Location
- Denver
- Posts
- 66
Mounted my own fucking skis today. I use a layer of blue painter's tape to make my marks, and a combination of steel ruler, combination square, eyeballs, and a lot of double-checking. Maybe not the simplest way of going about it, but it's worked well for me.

-
12-26-2015, 04:28 PM #878
Registered User
- Join Date
- Jan 2012
- Location
- Juneau
- Posts
- 1,140
That would be 5.85mm. 5.5mm is the spec., but who knows whether the 0.35mm difference is the cause of the problem. Certainly can't hurt to try to get it right. Two nickels and a penny is close to perfect. Three quarters is a tad closer than three nickels, though in the other direction. Or find the local gear whore and borrow the gizmo Dynafit provides with new bindings. Originally Posted by Gerome

-
12-26-2015, 05:11 PM #879
Registered User
- Join Date
- Nov 2004
- Location
- Too far from the snow
- Posts
- 508
I have now mounted or remounted a dozen pairs. This is the best skill EVAR! Screw those jig using Sport Chek retards!!!
-
12-26-2015, 08:05 PM #880
 logging road reclaimer
- Join Date
- Nov 2011
- Location
- Elmore, VT
- Posts
- 1,256
PSA: Mount your own fucking skis.
I had that issue once. Turns out it was my boots--teeny tiny cracks in the metal toe fitting. That's where I would look. I only noticed it skating on the flats. Originally Posted by Gerome
-
12-27-2015, 09:50 AM #881
Registered User
- Join Date
- Feb 2015
- Posts
- 193
Got my first spinner after quite a few mounts. Time to learn a new skill. What size do I drill to use a plastic insert? Is it worth it, or should I just put in a proper BF insert? It won't be a swappable mount.
-
12-27-2015, 09:56 AM #882
 pillowpants
- Join Date
- Sep 2004
- Location
- LV-426
- Posts
- 21,751
YMMV, but I've had good success with fixing a spinner by using a little fiberglass insulation stuffed into the hole, mixed with epoxy. My theory is that the fibers help bond to the edges of the hole and the epoxy holds everything in place. Originally Posted by Breomonkey
Originally Posted by powder11
-
12-27-2015, 09:57 AM #883
 Still practicing being 24
- Join Date
- Oct 2008
- Location
- On another tangent.
- Posts
- 4,028
PSA: Mount your own fucking skis.
Try machinable epoxy and redrill first. 5/16"/8mm hole for nylon tap ins. 1/4" for BF inserts. Originally Posted by Breomonkey
Best regards, Terry
(Direct Contact is best vs PMs)
SlideWright.com
Ski, Snowboard & Tools, Wax and Wares
Repair, Waxing, Tuning, Mounting Tips & more
Add TGR handle to notes & paste 5% TGR Discount code during checkout: 1121TGR
-
12-27-2015, 12:40 PM #884
Registered User
- Join Date
- Apr 2004
- Posts
- 1,018
This. Fibreglass roof insulation + slow set epoxy. Heavy on the fibreglass, like 4:1, way more than you'd think until it gets almost to a putty consistency. Stuff it in, snug up the screw, leave to set then fully tighten. Easy to re-do if it doesn't work. Originally Posted by El Chupacabra
-
12-28-2015, 10:32 PM #885
Registered User
- Join Date
- Dec 2009
- Posts
- 367
Just finished mounting my girl friend's skis with Sollyfit plates using tools and techniques pulled from this thread. Easiest mount yet thanks to Jon's bit/tap guide, precise plates and the collective knowledge gained from here. Props to all of the contributors. My contribution is that it's worth the time to clamp the drill guide to the ski so that it doesn't wander while drilling. I tried to drill while holding the guide with my other hand and noticed the guide move a little. The hole was OK, but not perfect. Four of those with D-fit toes might be enough to fuck up a mount. I clamped the remaining holes and they were all perfect.
-
12-31-2015, 09:20 AM #886
Registered User
- Join Date
- Apr 2004
- Posts
- 1,018
Just got done mounting the last pair of my own fucking skis for this winter. Quiver is looking strong if I say so myself, photo coming soon.
One hiccup in the last mount: one slight base dimple thanks to me using one screw slightly too long (I wasn't drinking, so there you go). A good fix I improvised was to cut out three tiny circles of Gorilla Tape, stick them on the dimple then clamp it hard with plates each side.
-
12-31-2015, 09:53 AM #887
 Registered User
- Join Date
- Dec 2007
- Location
- T-town, CO. USA
- Posts
- 2,098
Whenever you get a dimple: Originally Posted by LC
- Remove binding screw ASAP.
- Heat area with heat gun.
- Place a metal scraper on base.
- Pound with hammer.
- Replace with correct length screw.Leave No Turn Unstoned!
-
12-31-2015, 10:06 AM #888
 Detrusor
- Join Date
- Jan 2009
- Location
- Park City
- Posts
- 5,126
^^^^^^ this
I rip the groomed on tele gear
-
12-31-2015, 11:05 AM #889
Registered User
- Join Date
- Apr 2004
- Posts
- 1,018
Yep, I've done that in shops previously but I don't own a heat gun or hair dryer hence the improvised clamp. It worked very well, just sharing the tip. Originally Posted by DropCliffsNotBombs
-
01-01-2016, 02:26 PM #890
 Generic stoke comment...
- Join Date
- Jan 2009
- Location
- PC, UT
- Posts
- 594
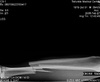
About to mount my first set of tech binders and ran into something that I'm not sure if it's a problem or not. I popped the boots into the bindings just for shits and giggles but noticed that the bindings don't lay flush on the top sheet.
The toe piece is elevated way up. And if I push the toe down so it sits flush, this is how far the heel lifts:

Pics are kinda crappy, but it shows the issue. It looks like the boot sole rubber prevents the the toe from rotating completely. Is this gonna be a problem? Do i have incompatible boots/bindings? What do?Last edited by BrokeSomeRibs; 01-04-2016 at 03:35 AM.

-
01-01-2016, 02:46 PM #891

 ____________________
- Join Date
- Sep 2008
- Location
- Not Brooklyn
- Posts
- 8,495
You have to remove some boot sole rubber. Not uncommon with all the different boot/binding combos out there.
-
01-01-2016, 02:56 PM #892
Generic stoke comment...
- Join Date
- Jan 2009
- Location
- PC, UT
- Posts
- 594
That's what I figured. Time to dig out the X-acto knife. Thanks!
-
01-04-2016, 03:32 AM #893
Generic stoke comment...
- Join Date
- Jan 2009
- Location
- PC, UT
- Posts
- 594
Mounted my own fucking skis today. Plum Race 170 on Down YW8 186’s from the group buy. Mounted with inserts from BF. Mount is dead fucking center. Beginner’s luck probably.

Big thanks to all the maggots on this thread who have contributed info over the years and HUGE GIANT thanks to Jonathan S. who provided a heel template and invaluable suggestions before (and during) the job.
The process definitely took longer than I anticipated as I was dealing with inserts and going slow. It was my first time doing any sort of binding mount but I figured I should sack up and jump straight to pro level mounting with race bindings in inserts. Spent about $120 on tools (bit, tap and tap handle, drill guide block, pozi driver, etc) and parts (inserts, screws, epoxy, vibratite, etc), but I know I'm doing at least 2 more mounts this season, so I'll make my money back before February.
Some lessons learned:
- Practice on a dumpster ski first. I suppose a 2x4 could work, but a real ski is definitely a better practice run.
- I used the folding paper method to find the center line. I made 4 dots along the length of the ski to ensure the line was accurate the entire length. Then connected them with a 48” straight edge. Having a 2nd person to hold the edge while you draw the line helps big time. Make your center mark as long as possible for greatest accuracy.
- Don’t use blue tape. If you’ve got it, use the tan/manila painters tape instead – it’s relatively transparent so you can lay strips over other strips and still be able to sight through it.
- The BindingFreedom drill/tap guide block is worth its weight in gold. But it WILL wobble and shift unless you clamp both ends. Be careful when clamping that you don't nudge it.
- I used a small finishing nail as my center punch. I filed the tip to get it razor sharp. When I had my template lined up, I gave the nail a very gentle tap to pierce the template paper. Then measured those dots in the paper against the ski edge with calipers to ensure both dots were equidistant. Then measure again to be sure.
- Once I was positive the side-by-side punctures in the template were equidistant to the edges, I lifted the template, then measured the dots in the painters tape below. Once those were confirmed to be accurate as well, only then I lifted up the painters tape on the top skin. Then measured the divots in the top skin. Once those were confirmed to be accurate, I finally drilled and tapped.
- Getting truly accurate punch-to-edge measurements was proving to be very difficult so I rigged this up. Just a straight edge taped securely onto calipers. Make sure to leave the lowest edge of the left caliper arm exposed so you can confirm alignment hasn’t shifted:

- BF recommends doing a normal mount with a normal 3.6 or 4.1 bit and normal screws to test fit and function. Once you confirm that everything works, pull the bindings, drill out the holes with the larger insert-specific bit, and then tap/install the inserts. I didn’t do this. I just went straight to inserts. I probably should have done a test mount first. But everything worked out fine.
-
01-04-2016, 08:30 AM #894
Registered User
- Join Date
- Jan 2012
- Location
- Juneau
- Posts
- 1,140
That is a sexy, light touring rig. Nicely done.
-
01-04-2016, 08:46 AM #895
 Registered Nutcase
- Join Date
- Sep 2010
- Location
- Golden, Colorado
- Posts
- 5,879
Looks awesome! Contemplating a similar setup myself.
-
01-04-2016, 10:57 AM #896
 Registered User
- Join Date
- Jul 2005
- Posts
- 1,821
Anyone in the Boulder area have a large Salomon guardian jig-a-rex plate that I can borrow in the near future? PM me if you can assist.
-
01-10-2016, 08:58 PM #897
Registered User
- Join Date
- Jan 2014
- Location
- Gaperville, CO
- Posts
- 5,929
I've done 5 mounts thus far, all this year. I haven't yet truly fucked up -- one mount a few mms forward of where I intended (even on both skis), one spinner (drilled out and nylon inserted.)
But I'm a little nervous about putting a 2nd set of holes in these skis I picked up today.

Don't worry, they're the sissy 184 version. Thinking Barons off my Megawatts to make this my only touring ski (short pass laps at Luv/Berthoud/Jones and running out the gates at Loveland)
-
01-12-2016, 10:50 PM #898
 ChairmanofthePowderBoards
- Join Date
- Jan 2013
- Location
- NWCT
- Posts
- 2,392

Barons on BCs
Quick and painless
Shout out to NEBCO for keeping me hydrated while in the man cave
-
01-13-2016, 09:07 PM #899
 Registered User
- Join Date
- Oct 2008
- Location
- Somewhere else
- Posts
- 5,791
Re-mounted these beauties at +2cm... you know... for switch landings.
Freeballed it... no problem.Goal: ski in the 2018/19 season
-
01-13-2016, 09:09 PM #900
Registered User
- Join Date
- Oct 2008
- Location
- Somewhere else
- Posts
- 5,791
I'm trying again but something won't let me upload photos properly...
Goal: ski in the 2018/19 season

 Reply With Quote

Bookmarks