
Oh, the toe screws are fine as are the front two heel screws
Results 476 to 500 of 7383
-
03-22-2014, 07:05 PM #476

 To the Thingamajigger!!!
- Join Date
- Oct 2007
- Location
- Between one small state and another
- Posts
- 1,858
"You can't drink all day if you don't start in the morning".
-Scottish Proverb
-
03-22-2014, 07:28 PM #477
To the Thingamajigger!!!
- Join Date
- Oct 2007
- Location
- Between one small state and another
- Posts
- 1,858
1234567
"You can't drink all day if you don't start in the morning".
-Scottish Proverb
-
03-22-2014, 07:31 PM #478
 Registered User
- Join Date
- Feb 2008
- Location
- here and there
- Posts
- 18,790
Check the print scale?
Sent from my Huawei-U8665 using TGR Forumswatch out for snakes
-
03-22-2014, 07:43 PM #479

 lusty gear whore
- Join Date
- Dec 2007
- Location
- monument
- Posts
- 7,466
^^^ also something to keep in mind if we ever start printing our own binders on 3d printers.
3.5 cm is a lot though.
Edit: are the BSL marks on the templates lined up properly for your BSL?In search of the elusive artic powder weasel ...
-
03-22-2014, 07:58 PM #480
To the Thingamajigger!!!
- Join Date
- Oct 2007
- Location
- Between one small state and another
- Posts
- 1,858
Bsls and scaling done correctly. It literally is printed way to far from the actual. Ya, i checked the print scaling with a ruler twice.
I eyeballed the new marks and set a boot perfectly.
???"You can't drink all day if you don't start in the morning".
-Scottish Proverb
-
03-23-2014, 06:01 AM #481
Registered User
- Join Date
- Feb 2011
- Location
- Zurich
- Posts
- 121
Don't you have the wrong template?? I guess the one pictured above is for the "old" Pivot (a.k.a. the Rossignol Axial 1) that looks like this: Originally Posted by Binky

You probably have a "new" Pivot (a.k.a. the Rossignol FKS) that looks like this:
-
03-23-2014, 06:14 AM #482
To the Thingamajigger!!!
- Join Date
- Oct 2007
- Location
- Between one small state and another
- Posts
- 1,858
Selle,
Perhaps! I will print the other and see what it looks like."You can't drink all day if you don't start in the morning".
-Scottish Proverb
-
03-23-2014, 06:30 AM #483
 Registered User
- Join Date
- Jun 2008
- Location
- SLCizzy
- Posts
- 3,679
Yep. That template even says axial on it.
-
03-23-2014, 06:51 AM #484
To the Thingamajigger!!!
- Join Date
- Oct 2007
- Location
- Between one small state and another
- Posts
- 1,858
Ya. I am a complete noob jong and printed the first template that said "pivot"
"You can't drink all day if you don't start in the morning".
-Scottish Proverb
-
03-23-2014, 05:46 PM #485
 Me encanta el país alto
- Join Date
- Dec 2005
- Location
- 山
- Posts
- 16,763
Just by way of encouragement, I did these today. Not a bad way to spend a Sunday afternoon - Lord SPs and Vertical STs:

-
03-26-2014, 05:04 AM #486
Registered User
- Join Date
- Feb 2010
- Posts
- 802
I just mounted my own fucking skis and learned a few things. Have mounted a bunch before, but the new learning includes:
1- If the shavings that come out by drilling kind of look like they might be metal, stop and check if they are, and use a 4.1.
2. Without a tap, metal can be hard to screw through.
3. Using a pointy binding screw, with no binding in place, works ok(ish) as a tap.
4. If you don't pre-drill Dynafit plastic base plates, the threads can fill up with plastic, which can't be good for binding retention.
5. If your ski graphics have orange lines across the ski, an orange sharpie might not be the best choice for marking a boot center line. You could do a perfect job, and end up with one binding 3" back. Especially if you are too friggin numb to actually look at the thing before you but an extra 9 holes in a ski that has been drilled 3 times already.
6. Even on it's fifth mount, a Karhu Bullldog Jak will hold up to a dog walk behind the house.
Last but not least, as a different way to line up the pins by messing with the toe screws. Dry fit it first to see if it happens to be perfect.
- In tour mode, snug, don't crank the middle screw.
- Lay the boot centered on the pins, don't bother snapping in.
- Remove boot gently.
- Mark a line on on the ski/baseplate that will make any movement obvious while tightening screws.
- Crank the first two screws down. No movement at the line? Double check anyway.
- Use a C-clamp to prevent movement of the binding. I clamped the ski, and used it as a stop to prevent the third screw from pulling the binding. I threw another clamp on the base plate itself for good measure, mostly because it was right there, and very easy to apply.
- Pick the best most centered of the three remaining holes. Snug a screw in, check for movement, then crank.
- Repeat with final screws.
This was my third Dynafit mount. Since this particular job actually involves the equivalent of mounting 3 skis, (see #5 above), I had some opportunities to improve along the way. The final mount was fast and easy.
I actually have a jig to facilitate the process. After doing my first mount successfully with paper templates, I decided to bring some skis that would be used for an 8 day tour to a shop. i was considering QCing those skis, and wanted to be spot on. Basically, I drove 2.5 hours round trip, got an $80 speeding ticket, and a mount I had to re-do in my basement. At $70, this jig paid for itself easily. But, its an old jig with worn bushings, and not perfectly centered, so there is still some tweaking to be done.
Anybody in Western Maine in need of a jig, workbench, and the right bits, give me a shout.
-
03-29-2014, 09:02 PM #487
 Foredeck
- Join Date
- Feb 2009
- Location
- NorCal
- Posts
- 996
This method for the final tweaking sounds genius. A lot of vague descriptions out there, which haven't worked for me. My last speed radical mount I had one toe that was slightly off- probably in the range of ok, but annoying bc I couldn't get the final adjust to take. Have been fixing to remedy this, will be trying this method out. Fortunately, I use standard binding sealant instead of epoxy, so hoping I can remove screws and replace without the holes being shot. Originally Posted by hhtele
-
04-04-2014, 08:30 PM #488
To the Thingamajigger!!!
- Join Date
- Oct 2007
- Location
- Between one small state and another
- Posts
- 1,858
I just fucking mounted my own fucking skis"You can't drink all day if you don't start in the morning".
-Scottish Proverb
-
04-04-2014, 08:35 PM #489
Banned
- Join Date
- Dec 2009
- Posts
- 7,167
they look a bit far back. shoulda brought em to me. a 12 pack will do

nice looking skis, btw
rog
-
04-05-2014, 09:38 AM #490
To the Thingamajigger!!!
- Join Date
- Oct 2007
- Location
- Between one small state and another
- Posts
- 1,858
Mounted exactly per engineer/manufacture rec. mid sole on the line.
I'll drink my 12 pack, thanks
I know yer trollin' but I felt like respondin"You can't drink all day if you don't start in the morning".
-Scottish Proverb
-
04-07-2014, 06:33 AM #491
Registered User
- Join Date
- Feb 2008
- Location
- here and there
- Posts
- 18,790
Not taking da bait, sure is hot out here.
Let us know how you like those Worths.watch out for snakes
-
04-07-2014, 11:36 AM #492
Registered User
- Join Date
- Nov 2011
- Posts
- 101
I'm mounting skis with inserts. No epoxy, but I do have Marine Goop. Has anyone used it for inserts? Since it doesn't dry hard, I'm not sure it will hold when I want to remove the bindings, on the other hand, there isn't much clearance in the threads, so a little flexibility may not matter.
-
04-07-2014, 06:49 PM #493
 beacon of grace & agility
- Join Date
- Feb 2010
- Location
- The Chicken Coop, Seattle
- Posts
- 3,180
^^^^
That didn't work out so well for me. I'm a convert of the 72 hour epoxy from jondrums.wait!!!! waitwaitwaitwaitwaitwaitwaitwait...Wait!
Zoolander wasn't a documentary?
-
04-08-2014, 12:37 PM #494
Registered User
- Join Date
- Nov 2011
- Posts
- 101
Yeah, i test fit one in a 2x4 and after 24 hours i was able to remove it with no force. Picked up some 24 hour epoxy instead.
-
04-11-2014, 10:03 PM #495
beacon of grace & agility
- Join Date
- Feb 2010
- Location
- The Chicken Coop, Seattle
- Posts
- 3,180
Well, I went ahead and did it. -0.5 worked out. No room for inserts...so I'll just have to spend more time on the billy goats for those in bounds days.
Imagine the before with FFG16s.
These are the after.
wait!!!! waitwaitwaitwaitwaitwaitwaitwait...Wait!
Zoolander wasn't a documentary?
-
04-11-2014, 10:11 PM #496
 Registered User
- Join Date
- Dec 2010
- Location
- Vancouver Island
- Posts
- 2,128
That be a sweet setup. Originally Posted by SupreChicken
"...if you're not doing a double flip cork something, skiing spines in Haines, or doing double flip cork somethings off spines in Haines, you're pretty much just gaping."
-
04-11-2014, 11:58 PM #497
 can fly!
- Join Date
- Jan 2004
- Posts
- 18,828
just remounted my own fucking skis with BF inserts today - another two three pair on the bench
-
04-12-2014, 06:33 AM #498
Registered User
- Join Date
- Feb 2008
- Location
- here and there
- Posts
- 18,790
Blue BF plates look good on that ski.
 watch out for snakes
-
04-14-2014, 01:38 PM #499
can fly!
- Join Date
- Jan 2004
- Posts
- 18,828
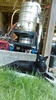
had to grind down my screws since I bought the wrong ones - Alpinord's earlier advice to put a nut on the screw before you grind it was spot on - removing the nut helps sorta re-cut the threads - only 1 was fucked up and that was the one I didn't use the nut on
also remounted young Owen's Gotama Jr with the Pure Kidz - I musta been dumb when I first did it cuz the heel on one was off by a bit - Alpinord's centering ruler, my HH jig and a properly clamped drill guide made all the difference
having better tools helps a lot
http://www.slidewright.com/
-
04-14-2014, 01:45 PM #500
Registered User
- Join Date
- Dec 2010
- Location
- Vancouver Island
- Posts
- 2,128
Tonight is the night - trying to re-align some pilot holes for inserts that are just off using a jig and some extra clamps. Wish me luck.
"...if you're not doing a double flip cork something, skiing spines in Haines, or doing double flip cork somethings off spines in Haines, you're pretty much just gaping."

 Reply With Quote
Bookmarks