
prevention is key but doesn't always happen.
i was looking back over some notes from an avy class and thought they might be appreciated here. i've added some text to to them but the overall idea is the same.
not many people truly prepare for a slide. you can practice all you want but there are things that occur that you will not be able to reproduce or simulate.
here are a few things to remember when things go south:
As the Victim:
--Yell. let someone know you are in trouble. this is one of the reasons you do not yell stuff like sick and whoa when you ski the backcountry. your partner can't always safely spot you the whole way down so if he hears something other than your agreed upon "i'm in a safe zone, come on down" term, he knows something is wrong.
--Get OFF the slab. gain speed quickly and take a 45* route off the slab in the direction you are headed or to the island of safety you have already identified. you have about 1-3 seconds to do this before you will be at the mercy of the moving mountain.
--Dig In. if you are in the center of a large slab and unable to 45 out, you can try to arrest on the bedsurface or grab a tree/rock. obviously this works better if you are at the crown (top of the slide) and if you are moving slowly. a whippet comes in handy for this but you can slide your hands down any ski pole to use the ends as arrest devices. in small soft slabs under a foot in depth you may be able to use your edges to hold onto the bedsurface. same idea as steep skiing here. don't lean your upper body into the slope or you will be taking a ride. instead, lean the knees into the hill and stand tall. again, this works better if you are at the top with less moving snow above you.
-- if you are caught, Swim and ditch your gear. it sounds funny but you aren't freestyling to get ahead of the slab. the idea is to drop your poles (remember this is easy since you aren't wearing pole straps in avy terrain) and get out of your skis if possible. in a violent slide they will drag you down like an anchor. i've heard people talk about rolling to get out of your skis. i have no experience with that but it sounds plausible. if your pack is less dense than the surrounding snow you are flowing in, it will help you float. keep it on because you may need your gear to extract yourself/others or treat injuries. when it comes to swimming try to keep yourself stomach up and use backstrokes. if there is a preferred direction to head away from obstacles or to get out of the slide, then emphasize that in your strokes. you often don't have much of a choice where you go in a slide but you may just be able to miss a tree/cliff band by doing so. remember to stay on top of the snow any way you can.
--When the snow slows, Get to the surface. jump, stick an arm up or whatever you do to be visible and hopefully unburried.
Clear an airway get a hand in front of your face so you will have an air pocket. survivors buried more than a few minutes almost always have an air pocket that prevents a death mask from forming over their face causing CO2 poisoning.
Expand your lungs. the weight of the snow is enormous. if you have full lungs and are under 3' of snow you will likely only have half capacity. hold the air in your lungs for a few seconds to allow the snow to set and not fill back in the room you have allowed for lung expansion. Don't Panic now. you've done everything you can do for the moment. all that is left is to lower your heart rate, breath calmly and wait for rescue. if you were practicing safe protocol you should have the rest of your party for extrication.
For the Rescuers:
--Watch you partner go down. follow his track and the moving snow that he/she may disappear in. if you lose sight of them either in snow or because of an obstacle, mark the point of last seen for a starting search point.
--Survey the situation. first, make sure the scene is safe enough to enter. are there multiple paths that drain into the same runout where you will be performing a rescue? can another party come in on top of you and release more slab above the crown? should someone be a lookout for other avalanches? spend a few seconds to take in the info you have seen and make a plan. it can prevent costly mistakes. (ie. on an ideal open slope you can have a spotter up to to direct the searchers to the point last seen and help line up any visual clues from above.)
--EVERYONE SWITCH TO RECEIVE. this is the biggest mistake in avy classes and situations with multiple searchers. you can spend minutes before you realize you are following a moving signal. don't make that mistake.
--Don't send for help, yet. you need all the available resources you have. if there are multiple searchers one can call for help but remember that a live recovery of a buried victim will be made by those already on scene. an organized search party will most likely recover a body.
--Go to the point last seen. always start your beacon search here unless you can see a hand, leg or some part of the victim. a pole/ski may be attached but it would be an aweful mistake to find out that the item came off and was downhill from the victim.
--Determine the likely trajectory and look for clues. line up the visual clues (poles, skis, gloves, helmet, etc) or terrain features that may funnel or slow debris such as gullys, trees, rocks and benches. Search these possible burial locations. obviously this is much easier to do with more than one rescuer. do not neglect checking the clues that may be attached to the victim, like poles or skis. people are found more quickly when an article, clue or body part is visible from the surface. check these and stand them up if the victim is not attached. it tells other rescuers that they have been checked and makes them obvious for the big picture.
--Use your beacon. The beacon leads to the probe. the probe leads to the shovel . and the shovel leads to your partner. When searching for a signal, hold the beacon near you ear while rotating the beacon through all 3 axis at around 1 axis every second. you will pick up the signal sooner if you beacon's orientation matches the transmitting beacon's. once you have a signal, keep your beacon in that orientation and follow the signal or directionals until you are within 3-5m.
--Slow down as you get close, take the time to really pinpoint the location and probe before digging. at this point, digital users should disregard directionals and focus on distance indicators, as the directions become unreliable so close to the buried beacon. micro grid to get your lowest distance(digital) or loudest signal(analog). the micro grid is simply moving the receiving beacon two dimensionally at the snow surface in a cross (+) fashion --X & Y axis-- to get the desired indication. holding the beacon in the same orientation, move the beacon up the slope until the distance indicator goes up. then, on the same line move down the slope until the distance goes up again. return to your lowest indication and repeat the process side to side to get your lowest indication. you may then need to repeat the Y axis (up and down) to see if your indicator drops again. repeat this process until you receive your lowest number and mark that point. when done properly this only takes 10 seconds and can save you minutes of probing.
if multiple rescuers are available you can have one setting up the probe and the other readying a shovel as you finish the micro grid search.
Continued in post #4...
Results 1 to 25 of 32
-
05-06-2005, 02:26 PM #1

 Registered Offender
- Join Date
- Jul 2004
- Location
- not far from snowbird
- Posts
- 2,244
SLIDE!!! what to do when the shit hits the fan
Last edited by AltaPowderDaze; 04-24-2010 at 10:59 PM.
-
05-16-2005, 09:52 PM #2
 There is no love in fear

- Join Date
- Nov 2004
- Location
- Green River, WY
- Posts
- 1,080
sweet post APD.
trying to picture this:
so kind of the same stance for a normal groomer turn? That sort of body position?don't lean your upper body into the slope or you will be taking a ride. instead, lean the knees into the hill and stand tall. again, this works better if you are at the top with less moving snow above you.
-
05-17-2005, 02:54 PM #3
glocal
- Join Date
- May 2002
- Posts
- 33,437
How bout this, APD?
Observer: point a finger at the victim while visible and anticipate movement/location if victim goes under by following the movement of the snow. A field of white rubble can blur a location once you move into it. Either find a landmark nearby to mark it in your mind as you go to it, or keep your finger on the presumed location to direct others to it.
-
05-17-2005, 04:35 PM #4
Registered Offender
- Join Date
- Jul 2004
- Location
- not far from snowbird
- Posts
- 2,244
--Leave the probe in place. systematically probe in a spiral fashion parallel to the average snow surface. each time you probe you will move ~25cm or 9" from the previous hole. within a short amount of time you reliably cover a large amount of area instead of repeatedly over probing the same area.
once you get a positive strike (often soft and gives when you hit, if soft tissue) leave the probe in place so you know where you are digging. if you are on a slope greater than 20 degrees it will take less time if you estimate the burial depth (look at the probe) and dig in from the downhill side at that same distance. on a flat slope, move 1.5 times the burial distance out and begin to dig. this will prevent you from digging into a pit that you cannot efficiently dig from. with multiple rescuers, use the conveyor method, which looks like an upside down "V". One rescuer is at the top and the rest are lined up along the V in an offset fashion. to accomplish this, extend your shovels to their longest length and hold them at your hip. the first shovel you meet on side "A" will be 2 shovel lengths away. on side "B", the next shoveler should be 1 shovel length away. from there back on both sides, each shoveler should be one shovel length away from the person in front of and behind them. this offsets the sides and accomplishes the conveyor. you can move snow with less effort and will be faster to the victim using this method and rotating positions every 2-4 minutes.
once you can determine the direction to the victims head, focus on digging to there first before further extrication.
in harder debris it may be necessary for the rescuer at the top of the V to cut blocks that can be removed by those behind him. this is done by turning to face the rescuers behind and chopping (using your foot to press the shovel into the firmer snow) a half moon pattern across your conveyor. once you have a block row cut out on two sides the other shovelers may remove it. trying to pry it out before cutting both sides may result in a broken shovel and longer extrication.
--Clear the head face and airway. use your mandatory OEC, WFR or other medical training to get an airway and check for any spinal injury before extricating. if you are waiting on professional help to extricate and you already have an airway, you should consider the environment you are in. would leaving the victim in the snow to insulate him/her from the cold? Do you have any other injuries that require immediate extrication to stabilize the patient? Are you in an increasing hazard and need to move to a safer area?
you need to give yourself and others the best chance of survivial you can. to do so you need to be prepared for the worst. have the tools and knowledge to take care of the unexpected.
edit:
 Originally Posted by AltaPowderDaze
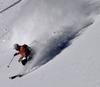
yeah, but more likely off pist. on a groomer 35*+ you can try it for yourself. get on the slope and edge into it. now try adjusting your canting by leaning into and away from the hill. you'll quickly find out that when you lean into the slope your skis wash out and you slide down the hill. lean too far away from the hill and you'll be tumbling down. the sweep spot for me seems to be as close to vertical as possible. here's a pic that shows some of what i'm talking about. i'm not leaning too far back into the hill but my form isn't perfect. Originally Posted by LaramieSkiBum

this is presuming that you are above your partner and not below or to the side of him/her. that would be really tough to remember to do in that situation unless you practiced it at the start of your beacon drills on real slopes. it would be a good idea to help line up a search area as long as you don't block your own field of vision with your hand.Observer: point a finger at the victim while visible and anticipate movement/location if victim goes under by following the movement of the snow. A field of white rubble can blur a location once you move into it. Either find a landmark nearby to mark it in your mind as you go to it, or keep your finger on the presumed location to direct others to it.Last edited by AltaPowderDaze; 04-24-2010 at 10:59 PM.
-
05-20-2005, 02:05 AM #5
glocal
- Join Date
- May 2002
- Posts
- 33,437
It's what I did when Honc went down in BC during the Summit up there. When he went by me only his head was sticking out. I figured he was going under, so I followed him with my finger, instinctually, I guess. And when it stopped, there he was - at the end of my finger.
-
01-14-2008, 10:34 PM #6
 AK Boarder
- Join Date
- Jan 2008
- Location
- Anchorage
- Posts
- 8
Thank you for this
"Nothing is impossible. You are only limited by fear and even that can be overcome." -Seth Morrison
-
01-15-2008, 12:34 AM #7
 Registered User
- Join Date
- Feb 2006
- Location
- Skiattle
- Posts
- 7,750
http://arlinc.com/index.php?section=snow_safety
sign up and receive the pdf files on what to do when caught
there is some stuff in those cards ive not read or seen suggested anywhere else
the amount of practical experience they have there tells me this stuff works
-
01-16-2008, 01:20 PM #8
 Denverd
- Join Date
- Oct 2007
- Location
- working or playing
- Posts
- 1,720
from a newspaper article quoted in the Whitefish thread
WTF? Never heard of this... Originally Posted by St. Jerry
 The killer awoke before dawn.
He put his boots on.
-
01-16-2008, 01:58 PM #9
 Jack's got my back
- Join Date
- Jan 2005
- Location
- cb, co
- Posts
- 5,329
^^^ Pretty sure McGuyver used this technique one episode, so it must work

Good bump. The only thing I would add is that you need to know your best options for escape BEFORE you drop in. i.e., before you make your first turn, you should know that if an avy starts when you are at point x, you want to go right towards safe point y. Farther down the slope at point a, the best bet is to go left to point b.
-
01-16-2008, 02:26 PM #10
 Carpe Skiem
- Join Date
- Oct 2004
- Location
- Colyrady
- Posts
- 3,780
Good info.
I think the 2nd item on the rescuers' list is missing:
- Make sure you as rescuer(s) are not in immediate danger before proceeding with rescue. No need to kill 2, 3, 4, etc trying to rescue 1. Check for hangfire avalanche not yet released, avy path's above etc. Of course you're almost certain to try to rescue your buddy regardless, but you should try to minimize further risk.
-
01-16-2008, 02:45 PM #11
 Registered User
- Join Date
- Feb 2005
- Location
- North Vancouver/Whistler
- Posts
- 14,442
This is an awesome (if ballsy) example of theory put into practise Originally Posted by goldenboy
Decker Avalanche
-
04-14-2010, 04:28 PM #12
Registered User
- Join Date
- Feb 2005
- Location
- North Vancouver/Whistler
- Posts
- 14,442
Bumped thread
-
04-24-2010, 11:02 PM #13
Registered Offender
- Join Date
- Jul 2004
- Location
- not far from snowbird
- Posts
- 2,244
thanks for the bump lee. i haven't looked at this for a while now. It's now edited to add in a few things like smitchell33 pointed out and get a little more in depth.
-
07-26-2010, 02:30 PM #14
 Registered User
- Join Date
- Mar 2009
- Posts
- 544
bump again for a fantastic post.
Be more like your dog...
-
07-28-2010, 12:51 AM #15
Good-lookin' wool
- Join Date
- Oct 2005
- Posts
- 11,811
Snow equivalent to slightly exhaling to follow the bubbles when tumbled by a wave. Originally Posted by khakis
Great post OP
-
11-11-2010, 08:42 PM #16
 Pow Surfing for the win.
- Join Date
- Feb 2010
- Location
- Colorado
- Posts
- 9,354
.....time to bump again!
Terje was right.
"We're all kooks to somebody else." -Shelby Menzel
-
11-19-2010, 12:29 PM #17
 Dr. Whom from Whoville
- Join Date
- Mar 2010
- Location
- Electric Larry Land
- Posts
- 5,316
More like drool, I think. If you're totally buried in fairly dense snowpack and ice chunks, and your arms and hands are unfortunately buried as well, I don't think you're going to be doing much spitting to figure which way is up...but drooling might work. Originally Posted by khakis
'Bout the only thing you can do in that situation is try and gradually move your fingers first...little by little...then your arms...again little by little...side to side...back and forth...packing away the snow to make the cavity a little bigger, so that you can move a little more. Do the same with the legs.
It IS true that it is easy to become confused as to which way is up under duress and with no light cues, just like the same thing can happen while taking a dive from surfing, etc, except without the advantage of automatically float upwards. It sounds sorta weird, but not knowing which way is up while buried DOES indeed happen. So I'd suggest drooling...not spitting. At least you can FEEL the drool running down your chin or UP your face. You wouldn't be able to see shit even if you could spit, so no point spitting.
The hard part is trying to do all this stuff BEFORE suffocating.
-
11-22-2010, 05:44 PM #18
 Live to Ski!
- Join Date
- Nov 2007
- Location
- Way down in the Hole
- Posts
- 1,416
Good post. This is great stuff to review every now and then. Just wanted to make one comment.
You say to rotate the beacon through all 3 axis until you get a signal. I believe that this is bad protocol. Going through 2 axis is a great idea (as in, turning your beacon from left to right, etc.), but by rotating up and down you're not helping. If the beacon is facing upwards and then you get the signal, what do you do then? The directional arrows become useless, and you are stuck without knowing where to go. That's why you should keep your beacon horizontal. You'll still pick up a transmitting beacon which is burried vertically, there will just be a shorter range. Originally Posted by AltaPowderDaze
Again, good post and a great review for me. Just wanted to throw in my 2 cents to better this for the future.Skiing, whether you're in Wisconsin or the Alps, is a dumbass hick country sport that takes place in the middle of winter on a mountain at the end of a dirt road.
-Glen Plake
-
11-23-2010, 10:17 AM #19
Denverd
- Join Date
- Oct 2007
- Location
- working or playing
- Posts
- 1,720
link to the avy cards is dead...those were good info. Does anybody have them saved and able to post or host somewhere? I may have them on the home computer.
The killer awoke before dawn.
He put his boots on.
-
11-24-2010, 01:39 AM #20
 ISO Shrubbery
- Join Date
- Dec 2004
- Location
- SoCal
- Posts
- 6,770
Great post!
It's amazing how hard moving heavy snow will pull on fat powder skis (like a parachute) if you get knocked off your feet to horizontal, even if you're hanging onto a tree. If the slide is moving fast enough, you may not be able to hang on. So give it all you've got.
-
11-24-2010, 09:48 AM #21
 Registered User
- Join Date
- Dec 2004
- Location
- Where the sheets have no stains
- Posts
- 24,133
http://www.powdertothepeople.org/docs/EscapeCapture.pdf
The above was a presentation from the Whistler ISSW, some thought provoking ideas. Worth the time if you haven't seen this.
In 2 large slides I have used these ideas (unknowingly) and they probably saved my life.I have been in this State for 30 years and I am willing to admit that I am part of the problem.
"Happiest years of my life were earning < $8.00 and hour, collecting unemployment every spring and fall, no car, no debt and no responsibilities. 1984-1990 Park City UT"
-
11-24-2010, 09:51 AM #22
Denverd
- Join Date
- Oct 2007
- Location
- working or playing
- Posts
- 1,720
There it is, thanks!
The killer awoke before dawn.
He put his boots on.
-
11-24-2010, 01:10 PM #23
 Registered User
- Join Date
- Jan 2007
- Location
- Durango
- Posts
- 778
Nice article bunion
-
12-05-2010, 12:11 PM #24
Live to Ski!
- Join Date
- Nov 2007
- Location
- Way down in the Hole
- Posts
- 1,416
Thanks for posting that article, Bunion. Really great info in there.
Its interesting how these things are all very common sense. You won't get in a slide and think, "Gee, what did that article I read say to do here?" At that point, it's all instinct, and you have to hope that you truely know these things, not just that you read them once.
Thanks again. Can never hear this stuff too much.Skiing, whether you're in Wisconsin or the Alps, is a dumbass hick country sport that takes place in the middle of winter on a mountain at the end of a dirt road.
-Glen Plake
-
01-05-2011, 01:43 AM #25
 be the ball
- Join Date
- Jan 2011
- Location
- Shuksan Arm
- Posts
- 27
is this out of the bruce tremper book? it seems to be the best. if not, what else is worth reading? Originally Posted by AltaPowderDaze
"snowboarding can be playing but to me it's more like living"
-craig kelly

 Reply With Quote
Bookmarks