
I’ll add - do not vibra-tite the screw before doing the mount while the epoxy is curing. It has enough friction to move the insert if you drilled the insert a little too deep.Originally Posted by galibier_numero_un

Results 4,501 to 4,525 of 7388
-
01-02-2021, 06:01 PM #4501

 Registered User
- Join Date
- Jan 2017
- Location
- Seattle, WA
- Posts
- 2,274
-
01-02-2021, 07:02 PM #4502

 stole the who hash
- Join Date
- Sep 2009
- Location
- in the trench
- Posts
- 16,632
Originally Posted by galibier_numero_un
Sooo good. Thank you both. I'll definitely mount , using the tech toe, while the epoxy is curing. Thats great and should alleviate any issue, if im careful to not get any epoxy in the insert. Feeling better about doing this now Originally Posted by thejongiest
Sent from my SM-G950W using TGR Forums mobile app
-
01-02-2021, 08:53 PM #4503
 Registered Loser
- Join Date
- Mar 2017
- Location
- SLC, Utah
- Posts
- 4,746
on the epoxy on the insert front: Originally Posted by grinch
i got a thing of goo gone and a buncha q tips and i'm just anal about go gone'ing the hell out of the inside of every insert
might be a better way to do it but this has worked really well for me. i clean the hell out of them before and after inserting. no issues yet.
i'm just a jong so take that with a grain of salt but it works really well. glue in the insides of the inserts is a nightmare that keeps me up at night.
-
01-02-2021, 10:04 PM #4504
stole the who hash
- Join Date
- Sep 2009
- Location
- in the trench
- Posts
- 16,632
No that makes sense. I'll do that. Can't hurt and i want this to work well. Thanks Originally Posted by tgapp
Sent from my SM-G950W using TGR Forums mobile app
-
01-02-2021, 10:14 PM #4505
Registered Loser
- Join Date
- Mar 2017
- Location
- SLC, Utah
- Posts
- 4,746
yep my other jong advices: Originally Posted by grinch
- tap guides r ur friends, i wouldn't trust me to tap straight
- same goes for drilling
- i found a can of compressed air to be mega helpful in cleaning shit out
- clear your volcanos, i got the silly BF tool to do that and i actually love it, it's super easy to use and worthwhile IMO. obviously there are other ways to do this.
- i like to let the epoxy sit in the holes for a minute. i also tap the skis down to get the epoxy to settle, and then i add more. it bubbles much easier than wood glue, and if you're not careful, you'll get dry spots before putting inserts in.
- inserts go in super easy if you back turn a 1/4 turn first so it seats in the threads properly and then put em in. insert tool to start and then flathead to finish
- let em dry binders on, use your boots to line up pins before (no vibratite like others have said). BUT let the glue cure for like 45 or so minutes, if you try to put binders on right away and you need to tweak the tension across the binding (by loosening and tightening different screws), you can back out an insert with the machine screw if you try to loosen it. you gotta be super careful.
- let em dry upside down (h/t norse for that tip)
good luck mag, lmk if i can help with any other jong advice. this is all super fresh to me because i just did 90 inserts or so in the past two weeks or so. it's not hard just takes time.
-
01-02-2021, 10:19 PM #4506
 Registered User
- Join Date
- Aug 2014
- Location
- Imaginationland
- Posts
- 4,846
Disk brake cleaner. Originally Posted by tgapp
The main reason to clean inserts thoroughly before install is to remove residual oil left from the machining process. It will prevent the epoxy from bonding the insert properly in place.
-
01-02-2021, 10:23 PM #4507
Registered User
- Join Date
- Aug 2014
- Location
- Imaginationland
- Posts
- 4,846
Mounted some replacement Mfree 108's for Kopi_red tonight after I broke his first pair riding them on day one. My bad.
Also mounted shifts on Line Sakanas for him using a template I stenciled real quick. I love this shit. So therapeutic.
-
01-02-2021, 10:24 PM #4508
Registered Loser
- Join Date
- Mar 2017
- Location
- SLC, Utah
- Posts
- 4,746
huh cool Originally Posted by NW_SKIER
i was using goo gone for that step, i hope i'm not gonna die
i would just get a rag wet in goo gone and rub it all over the insert before putting it in
i did like 90 inserts so i sure hope that wasn't a fuckup, but if it was, don't take advice from me
-
01-02-2021, 10:25 PM #4509
Registered Loser
- Join Date
- Mar 2017
- Location
- SLC, Utah
- Posts
- 4,746
Originally Posted by NW_SKIER
that's a sick setup. i want a pair of sakanas, that's fucking rad
-
01-02-2021, 10:26 PM #4510
Registered User
- Join Date
- Aug 2014
- Location
- Imaginationland
- Posts
- 4,846
You're likely fine. Just trying to make your cleaning step more efficient.
-
01-02-2021, 10:29 PM #4511
 Registered User
- Join Date
- Feb 2013
- Posts
- 2,793
I paid for my first insert install and I dont think the shop got rid of the cutting oil on the inserts. Every once in a while I get an insert that backs out when I swap bindings. All I've done is reepoxy and reinstall and I havent had any issues beyond that.
-
01-02-2021, 10:31 PM #4512
Registered Loser
- Join Date
- Mar 2017
- Location
- SLC, Utah
- Posts
- 4,746
Originally Posted by John_B
yikes man
also when i was doing my QK jobs on already mounted skis i was kinda blown away by how many corners i saw that shops had cut. like HUGE volcanos, poorly trimmed plugs, mounts that weren't on true center, all sorts of shit
these are reputable ski shops who have great reputations & such, not trying to shit talk em, but it does reinforce the old "if you want something done right you should do it yourself" adage
-
01-02-2021, 11:06 PM #4513
 Registered & certifiable
- Join Date
- Dec 2014
- Location
- Colorado Front Range
- Posts
- 4,647
Good point about bubbles. I cut 6" lengths of guitar strings (wound ones) which I use to move the epoxy around, but yeah ... let it settle, and wiggle it around some more. Good point about inserts backing out - short cure time before screwing in binders to align the inserts. Originally Posted by tgapp
... ThomGalibier Designcrafting technology in service of music
-
01-02-2021, 11:24 PM #4514
stole the who hash
- Join Date
- Sep 2009
- Location
- in the trench
- Posts
- 16,632
Thanks again. I have bf guide block and the volcano tool. I often free hand drill the hole and tap but with the cast set up ill be sure to use the guide and clean out the insert with the recommended solution that ive been using. Good reminder on using my drill bit/tap guide.I havent cleaned out the inner insert threads but this will be the first time i put the toe piece in place while it cures . Originally Posted by tgapp
Ive ordered a new punch from bf and a drill bit along with a bunch of screws to have. The bf punch and bits fit the jiga rex proper unlike my current bits and punch. Added a heli coil retraction bit too. Hoping with some soldering gun heat i can pull those heli coils and thread some inserts straight in. Sucker for punishment possibly
Sent from my SM-G950W using TGR Forums mobile app
-
01-03-2021, 12:20 AM #4515
King potato
- Join Date
- Feb 2011
- Location
- BC
- Posts
- 2,121
How did you break them? Originally Posted by NW_SKIER
-
01-03-2021, 12:43 AM #4516
Registered User
- Join Date
- Aug 2014
- Location
- Imaginationland
- Posts
- 4,846
I crashed really hard. Thinking one ski hit the other just right. Not really sure, to be honest. I bounced off a couple snow covered boulders too so it's anyone's guess. Originally Posted by mr_pretzel
-
01-03-2021, 02:15 AM #4517
 Squatting Slav
- Join Date
- Nov 2011
- Posts
- 255
Nice guide Thom. Originally Posted by galibier_numero_un
To be exact - BF suggests 20mm for the rear heel pivot holes, you need 18mm
Sent from my iPhone using TGR Forums
-
01-03-2021, 10:43 AM #4518
Registered User
- Join Date
- Feb 2005
- Posts
- 754
I didn't mount my own fucking bindings but I removed a piston plate on some GS skis to put it in the softer flex position. Damn it's hard to find solid info on piston plates.
After taking all the mounting screws out, there is a little oblong hole near the front that needs an awl inserted and pressed down( to rear of ski) so the plate can be pulled off.
-
01-03-2021, 01:04 PM #4519
Registered User
- Join Date
- Jan 2020
- Posts
- 160
What size tap am I looking for at the store for? I have the 4.1 drill bit on order for a mount this week.
-
01-03-2021, 01:17 PM #4520
 Registered User
- Join Date
- Jan 2019
- Location
- Mid-tomahawk
- Posts
- 1,722
For inserts, 5/16-18 bottoming tap. Originally Posted by AZskibum
If you're talking regular binding screws, you're not going to find that at the hardware store. Get one from Slidewright.
-
01-03-2021, 01:18 PM #4521
 Registered User
- Join Date
- May 2015
- Location
- inw
- Posts
- 1,278
-
01-03-2021, 03:52 PM #4522
 Believe
- Join Date
- Oct 2003
- Location
- Lapping the pow with the GSA in the PNW
- Posts
- 5,367
Finally got around to mounting these...
Thanks to gregorys for his Warden 13 demo template. Now that my son can manage my skis, the “demo fleet” is growing and my kid is digging it!
In constant pursuit of the perfect slarve...
-
01-03-2021, 07:50 PM #4523
Registered User
- Join Date
- Jan 2020
- Posts
- 160
Cool, picked up the tap/handle. Do you guys trust the Xmm printed on the boot (I'm assuming that's what shops do) or do you measure it yourself?
-
01-03-2021, 08:00 PM #4524
 User
User
- Join Date
- Dec 2010
- Location
- 西 雅 圖
- Posts
- 5,512
Shops put the actual boot in a jig. If you are using a printed template and chopping off both ends at a given length, I would measure the BSL "just to make sure" . . . Originally Posted by AZskibum
-
01-04-2021, 04:28 PM #4525
 Registered User
- Join Date
- Aug 2013
- Posts
- 2,027
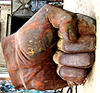
NW_SKIER doing some dental work.

 Reply With Quote
 ), I noticed that the BF heel screw spec (I think the longer pair) was on the short side. When measuring, I ended up (and this is from memory) with 24mm screws that I shortened to 22mm (the choices in this length were either 20 or 24).
Bookmarks